Your Cart is Empty

Here is a simple guide that will help you install genuine Honda Access JDM door visors on your Acura RSX. For those that are not familiar with the Honda Access visors, positioning the lower clips on the window frame may be a bit tricky.
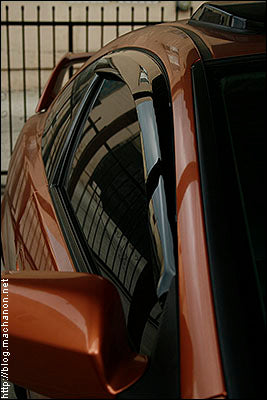
The Honda Access door visor is a handy accessory that allows you to cruise with your window slightly down without being blasted by wind noise. It’s especially helpful during the rain as it allows the driver to roll the window down just enough to alleviate interior fog build up and keep the rain (or snow) out without turning on the A/C.
Parts needed:
Honda Access door visor kit (part #: 08R04-S6M-001)
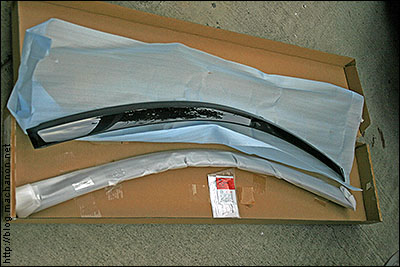
Microfiber cloth
Soap & water
* Flathead screwdriver (optional)
Preparation
Start by cleaning the upper window trim with soap and water with the window rolled down. Scrub vigorously with a clean microfiber towel:

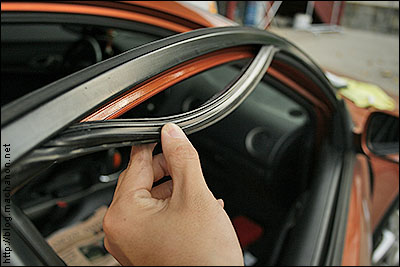
Next, pull the weather strip along the lower part of the door frame. You may need a small flathead screwdriver to help pop out the strip. You do not need to peel off the entire strip, just the last half of the frame:
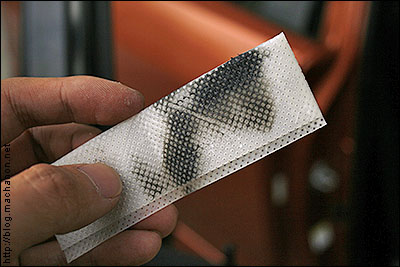
Next, take the included 3M PAC primer and remove the towel inside. Then vigorously clean the surface of the upper plastic window sash again:

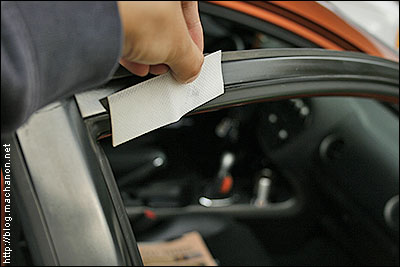
Clean as much as you can, utilizing half of the towel per door. If you think you’ve cleaned the surface well enough with water and soap, think again:
After you’re done cleaning the surface with the 3M cleaner, put it back in its package to avoid having its cleaning agent evaporate while you install the door visor.
Installation
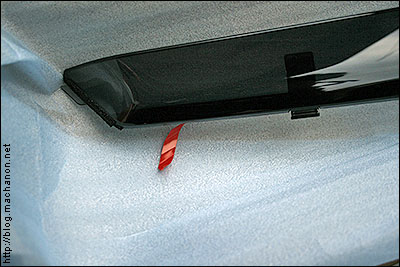
You can start on either side. Pull out the correct door visor that corresponds to the door you will be working on, then peel out an inch of red adhesive backing and tape it to the front of the door visor:
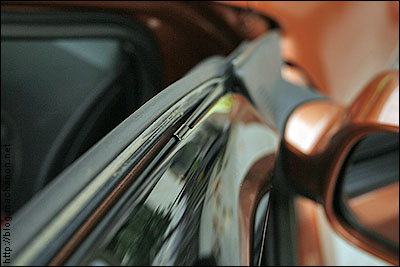
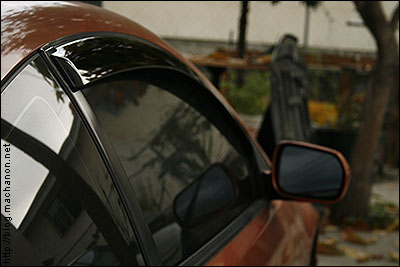
Do this to all the backing (3 per door visor). However, peel off only half of the backing on the tapered back-end of the door visor. Next take the front of the door visor and locate the installation key tab. Insert this into the outer side mirror plastic housing as illustrated:
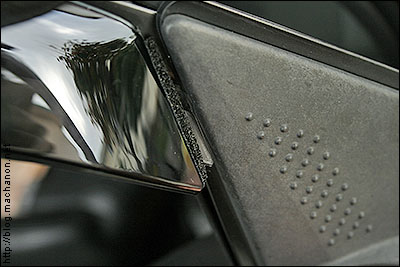
Make sure the tab is aligned with the outer side mirror housing and flush:
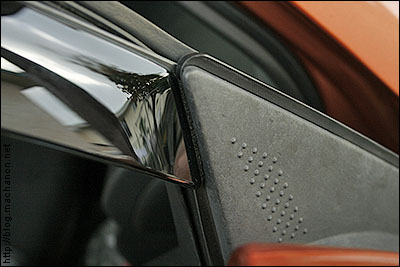
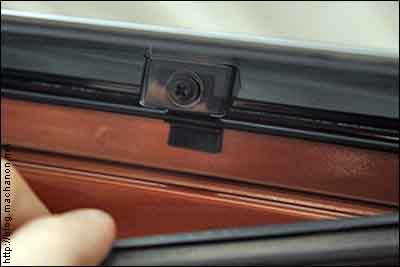
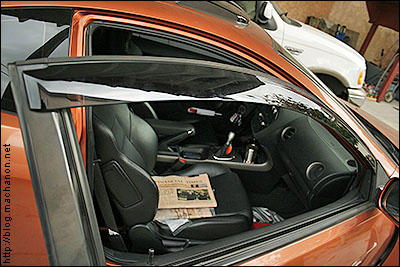
Next slide the front two clips on the door visor onto the upper door frame trim:

Next, take the remaining two rear clips and slide it into the metal door from from underneath:

Make sure these two remaining clips sit flush with the metal frame as they will be securing the door visors onto the door frames:
Once you’ve double checked the alignment, carefully peel out the red adhesive backing slowly while applying pressure with your palm to ensure secure contact:
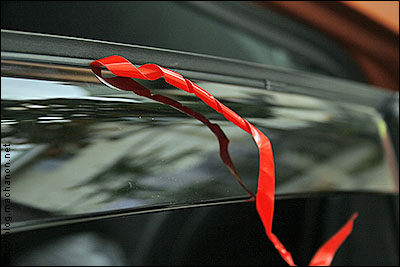
When you are about to peel the red backing through the front two clips, gently lift up the door visor to give way. Continue peeling the red backing until you are done peeling the first backing. You do not need to lift up the second half of the door visor as you peel off the second strip of red backing as the clips are located underneath the door visor and will not interfere. Again, apply pressure with your palm as you peel away the backing. You may also want to move the door visor towards and away from you to ensure 100% contact between the adhesive and the plastic outer window frame trim. While removing the backing and applying pressure, always keep your eyes on the door visor to make sure they do not move in the process and that it sits flush with the door frame.
Finally, peel out the last backing on the tapered end of the door visor and apply the same amount of pressure, then look underneath at the last two clips to ensure that they are sitting flush with the metal door frame. Push the sagging lower weather strip you’ve removed earlier back into its grooves. You may use a flathead screwdriver to push the strip back in, or you can simply use your thumb with a bit of pressure:
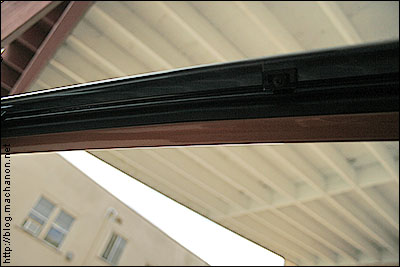
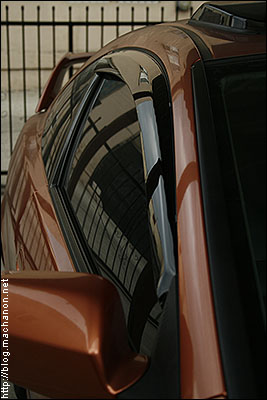
Make sure the lower weather strip is properly back in its grooves and flushed with the metal door frame. The finished install:
Wipe the door visors with a clean microfiber cloth:

Enjoy your new genuine and functional accessory from Honda!

DIY by http://www.diymyhonda.com/rsx/honda-access-door-visors-install-guide/